Affinity provides features in conjunction with Laserfiche. To use Affinity, you must first install Laserfiche. If you have not already installed Laserfiche, please see our instructions on Laserfiche - Install on Windows.
This program is only available for certain users due to licensing agreements. If you believe you should have access to this program, please contact Support Central.
This installation requires you to restart your computer. Please save and exit out of all other applications now.
Connect to the Server:
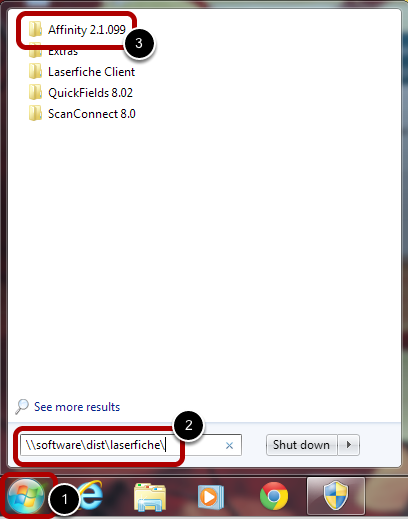
- Click the Start Menu
- Type \\software.oc.edu\dist\laserfiche in the search bar
- Select Affinity 2.1.099
Select Affinity Application
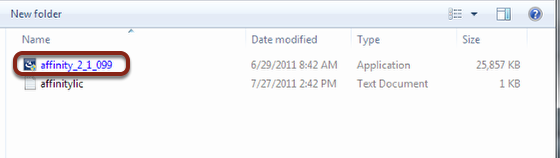
- Select affinity_2_1_099
Allow the Program to Make Changes
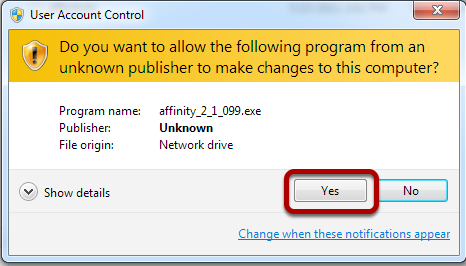
- Click Yes
Start Install Procedure
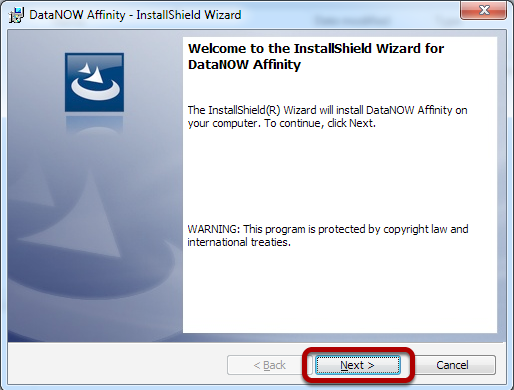
- Click Next
Accept the License Agreement
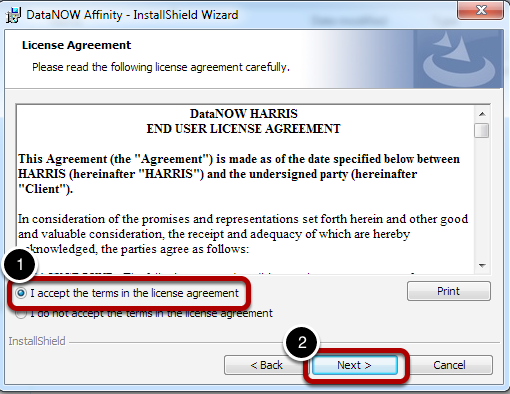
- Select "I accept the terms of the license agreement"
- Click Next
Choose Install Destination
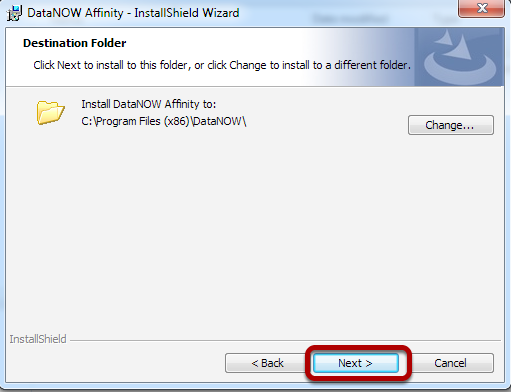
- Click Next
Run the Installation

- Click Install
Allow the Installer to Run

This may take several minutes.
Complete the Installation

- Click Finish
Restart your Computer
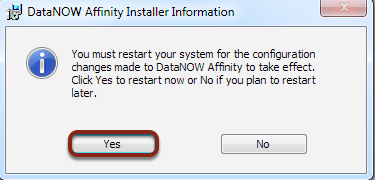
- Click Yes
Finish Set-Up Process
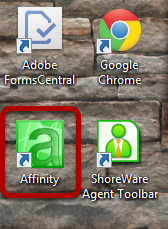
- A shortcut will be created on your desktop. Double-click on Affinity to finish the set-up process.
Scan for Repositories
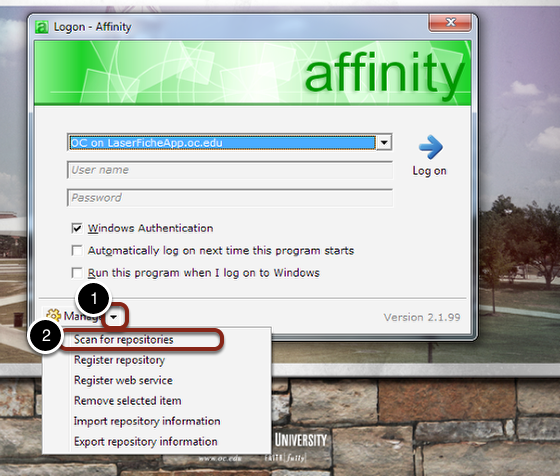
- Click on the arrow to the right of Manage
- Select Scan for Repositories
Acknowledge the Message
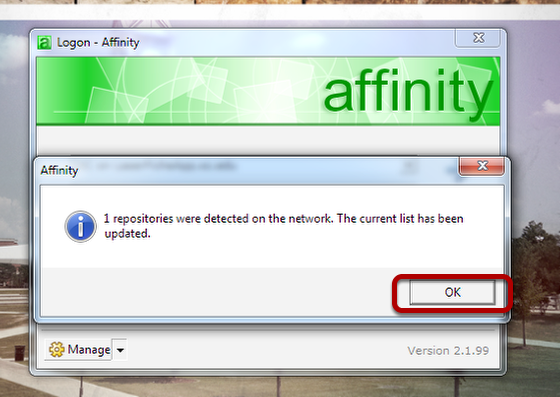
- Click OK
Prepare to Log In

- The repository should say OC on LaserficheApp.oc.edu.
- Make sure the check box for Windows Authentication is checked.
- Click the Log on arrow
Locate Affinity Toolbar
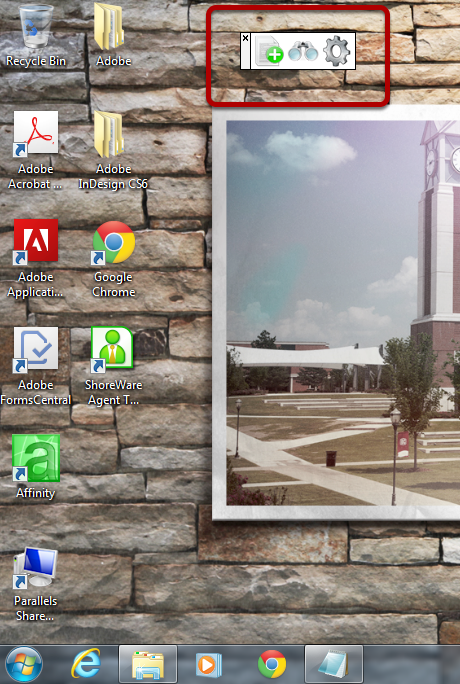
- You should now see the Affinity tool bar on your Desktop.
Global Configuration


- In the bottom right-hand corner, click the arrow on your system tray.
- Right-click on the Affinity icon
- From the menu that appears, click on Tools
- Select Global Configuration
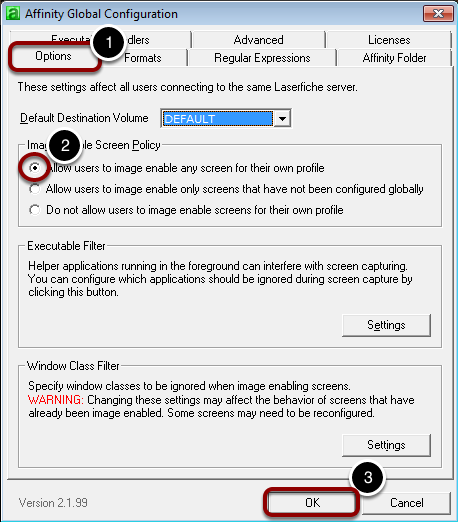
Options Tab
- Open the Options tab
- Make sure Allow users to image enable any screens for their own profile is selected in the Image Enable Screen Policy.
- Click OK
Configure Internet Explorer
- Open Internet Explorer
- Click the Settings icon in the top Right select Manage Add-Ons
- Click Manage add-ons
Enable DataNOW Add-On
- Find the DataNOW browser helper and make sure it is Enabled.
- Click Close
Configure Affinity with Colleague


- Open Colleague (http://colleague.oc.edu)
- Search for a person
- Select the Gear icon on the Affinity Toolbar to open LaserFiche
Create Configuration
- On the Image Enable Screen, select Local Configuration from the drop-down.
- Create New Configuration should be selected
- Click OK
Configure Tokens
- Click on the User Defined Tokens tab
- Click on the ID number
- Select Add Token
Add Token
- Change the Token Name to IDNumber (with no spaces).
- Click OK
Configure Search
- Select the Configure Search tab.
- Select your default search template.
- Click the arrow next to ID number and select IDNumber in the popup that appears.
- Click OK
Install Complete
- The install is now complete. After you find a person in Colleague, you can click on the binoculars to open the person in Laserfiche.
Success!
You have successfully installed and configured Affinity for Laserfiche.
Contact Support Central
- View Location
- View Hours
- Phone: 405-425-5555
- Email: supportcentral@oc.edu
Comments
0 comments
Please sign in to leave a comment.