Use the instructions below to configure Laserfiche Snapshot Printing.
This program is only available for certain users due to licensing agreements. If you do not have access and believe you should have access to this program, please contact Support Central.
Open the Laserfiche Snapshot Configuration Tool

- Click on the Start menu
- Click on the Laserfiche Folder
- Click on the Snapshot Folder
- Click on Snapshot Configuration (Current User)
Log in With Windows Credentials

- On the Repository Login Screen:
- Select Windows Authentication
- Click OK
General Configuration

- In the General Tab, choose your default folder
- Click on the button with 3 dots to open the folder browser.
- Select the folder you want to use as your default folder. If you're not sure which folder to use, please contact Support Central.
- Click OK
Template Configuration

- Open the Template tab.
- Uncheck the check box next to When no template is assigned, use the Laserfiche default template
- Click the arrow next to the Template box.
- Select the template you need. Most student files use Student Financial Services
Text Configuration
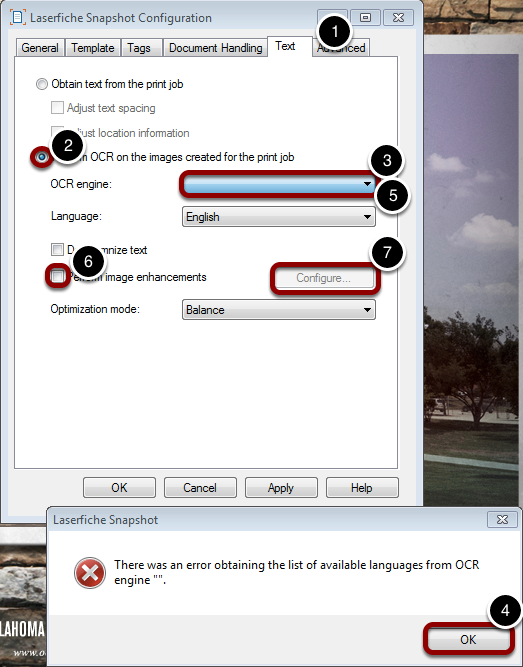
- Open the Text tab.
- Click on the radio button next to Perform OCR on the images created for the print job
- Click the drop-down box by OCR engine. It will already have Omni-page selected. Select OmniPage again.
- An error will pop up. Click OK
- Go back to the OCR Engine drop-down and select Omni-page again.
- Check the box next to Perform image enhancements
- Click Configure
Configure Image Clean-up Options
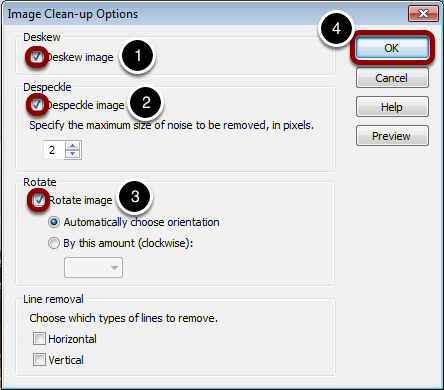
- Click the box next to Deskew image
- Click the box next to Despeckle image
- Click the box next to Rotate image
- Click OK
Text Configuration Continued
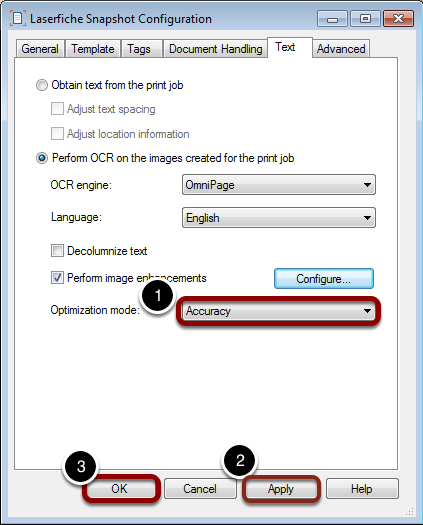
- Change the Optimization mode to Accuracy
- Click Apply
- Click OK
Success!
Configuration complete. You are now ready to use the Laserfiche Snapshot printer.
Contact Support Central
- View Location
- View Hours
- Phone: 405-425-5555
- Email: supportcentral@oc.edu
Comments
0 comments
Please sign in to leave a comment.